Set up your GEN3 Workspace with $300 free trial Google credits
If you’ve never logged into the Google Cloud Platform (GCP) console to set up billing, you are eligible for $300 in free GCP credits. Step-by-step instructions for how to access the credits can be found here.
The first step is to set up a Google Cloud Billing account using your Organization or personal google account ID in the GCP console.
1.1. Go to the GCP console at https://console.cloud.google.com/ If you haven’t already set up a Google Cloud Billing account, you’ll be greeted with an invitation to activate your free trial in the banner at the top of the page:

1.2. Click the activate button and follow the instructions to sign up for a Cloud Billing account and get your credits.
Note: You’ll need to verify the account information with your details as shown below :
1.2.a. Give appropriate details asked for Organization. Once done click the checkbox and continue.

1.2.b. In this step you’ll need to verify you’re a person with a one-time verification sent to a cell phone.

1.2.c. Give account type, business name and credit card, PayPal account or bank account to verify your identity. Google will notify you before your credits expire and will not charge your credit card without your direct permission.

1.3. You can verify the Google Cloud Billing account in the Billing page. You should see My Billing Account in the top left. That’s your new Google Cloud Billing account!

Google will create a Google project, My First Project, funded by your free credits, which you can see in the My Projects tab.

1.4. Steps to follow to get Google App Client ID and Client Secret
1.4.a. Login to Google Developer Consoleusing your Google account credentials.
1.4.b. From “Select a project” on top header bar , click on your project. If you dont see any projects create a new project.

1.4.c. Click on “OAuth consent screen” by hovering mouse on “APIs & Services” from the left side menu.
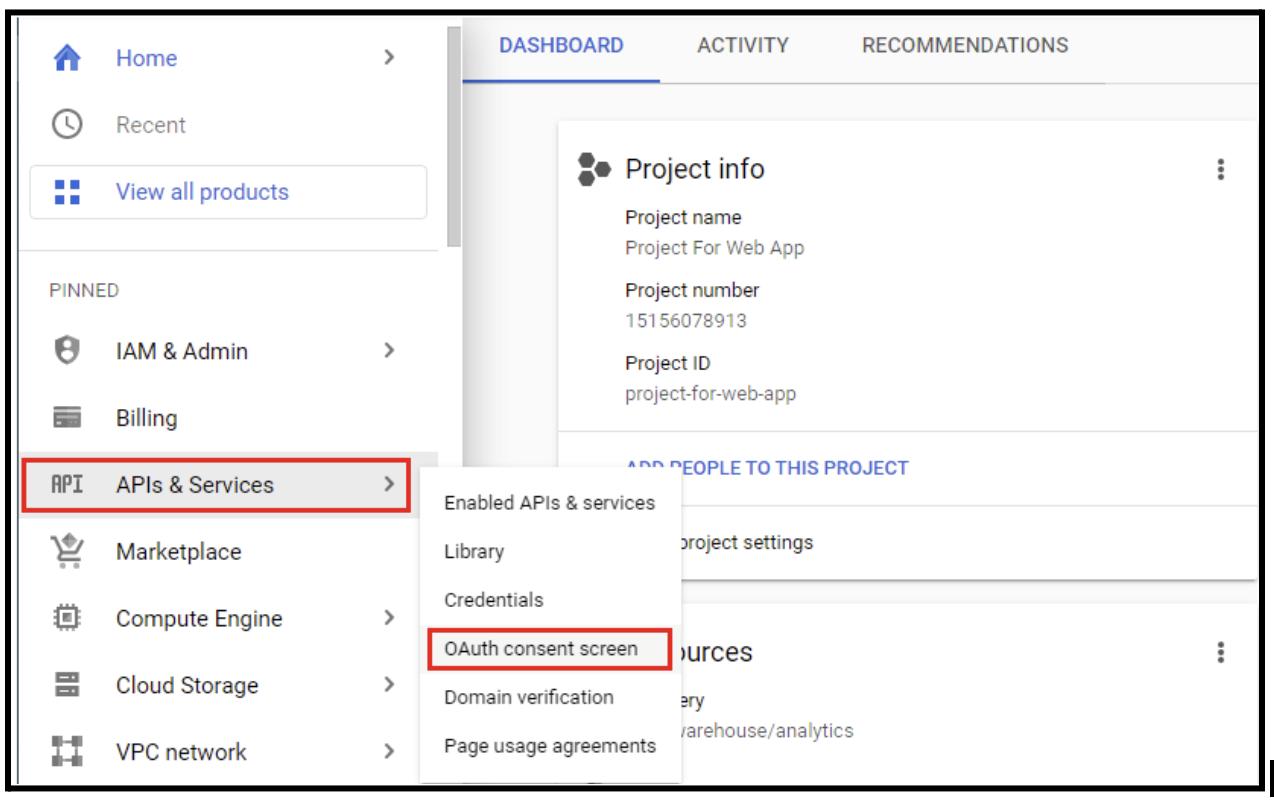
1.4.d. On “OAuth consent screen”, Choose User Type as per your requirement and click on Create button to process further.
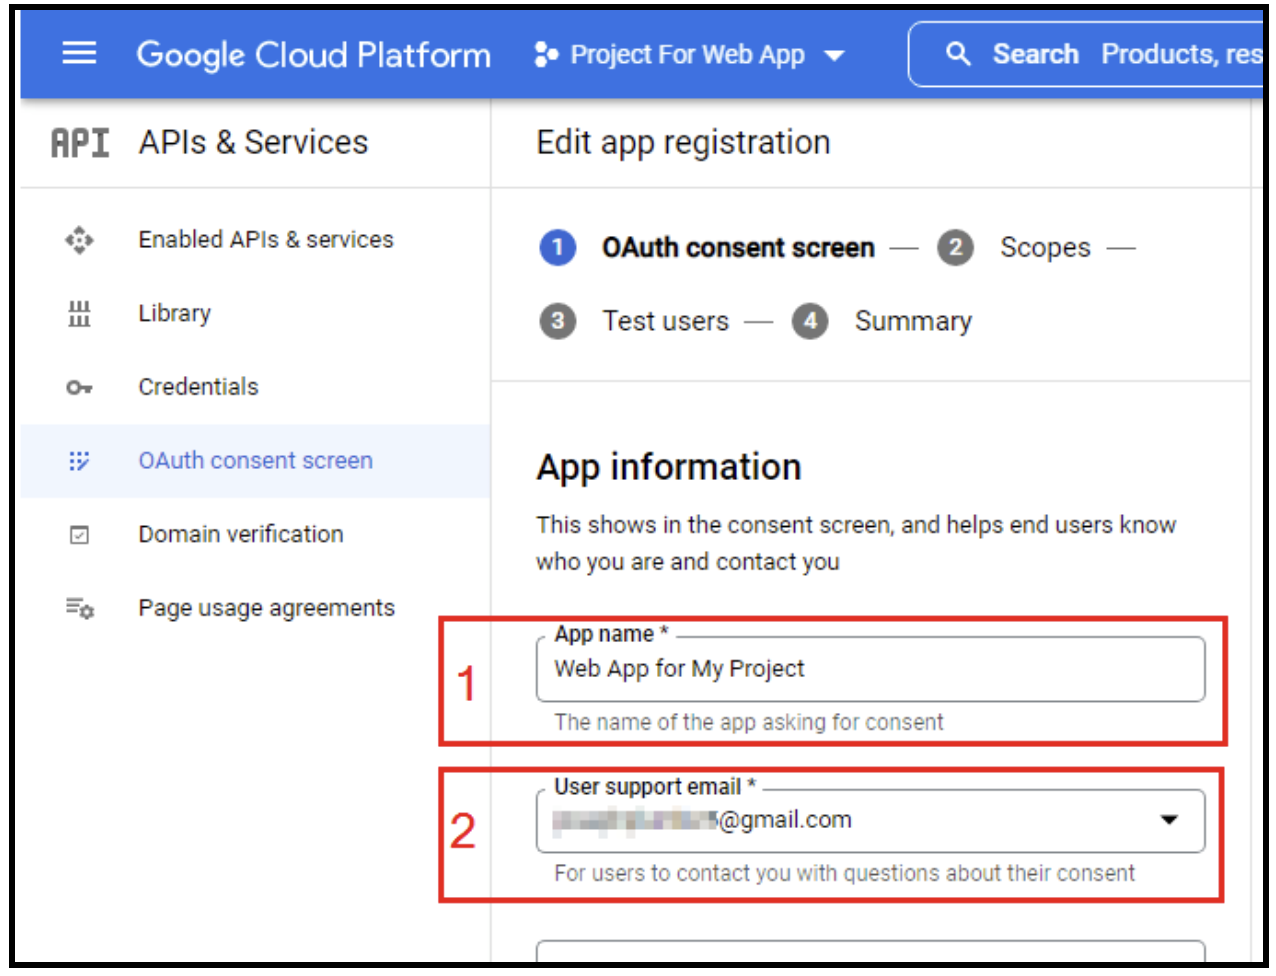
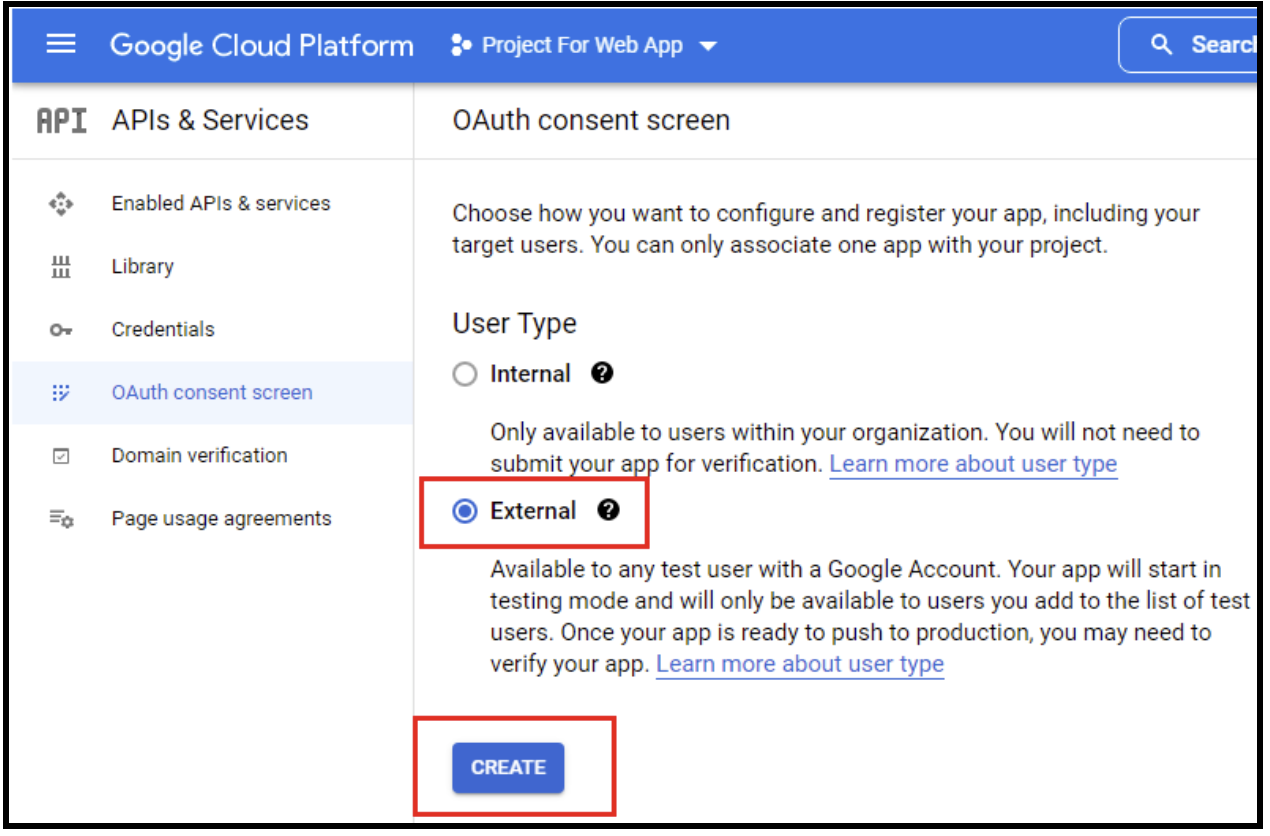 1.4.e. Add Application name, select Support email,add Authorized domain and Developer Content Information. Then click on the Save and Continuebutton.
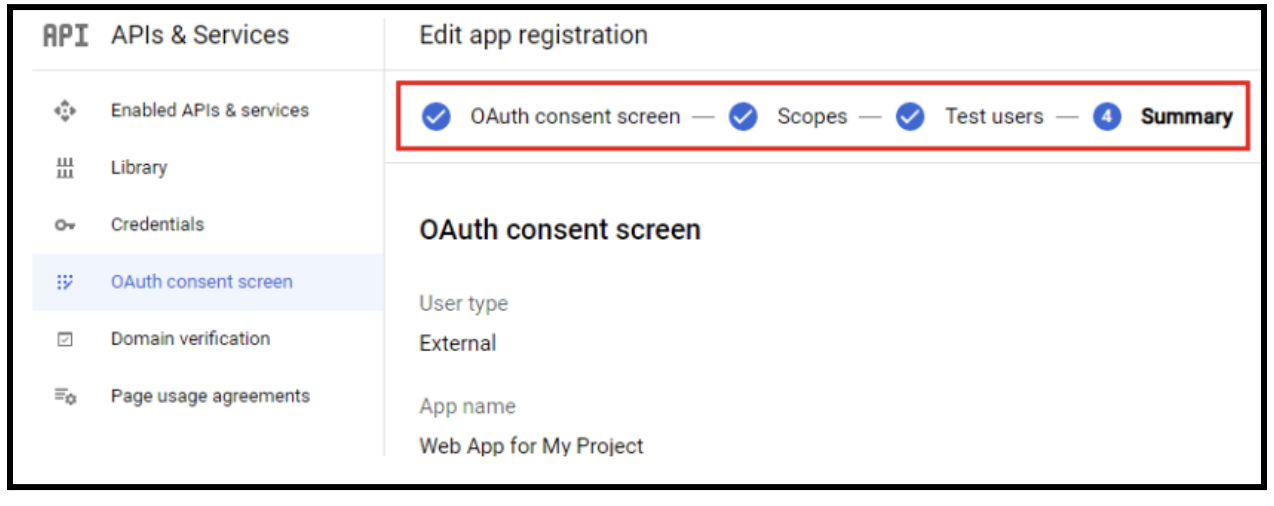
1.4.f. After complete all 3 steps in OAuth Content screen, click on Back to Dashboard on Summary Step..
1.4.g. Aftercreating the project, click on “Credentials” from the left side menu to open theCredentialsscreenClick on “Create credentials” and from the dropdown list selectOAuth client ID.
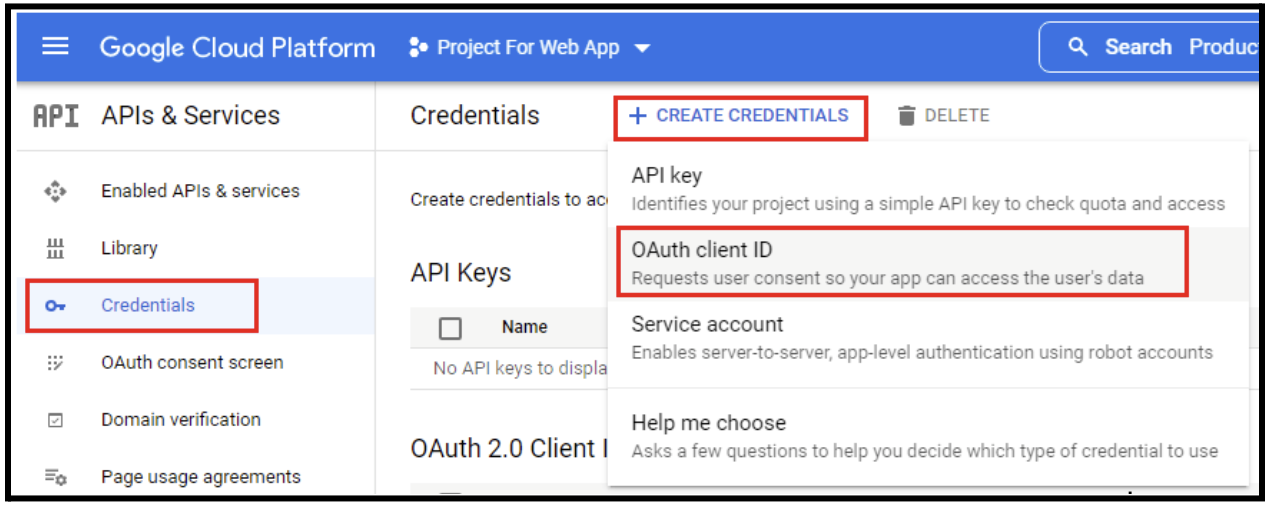
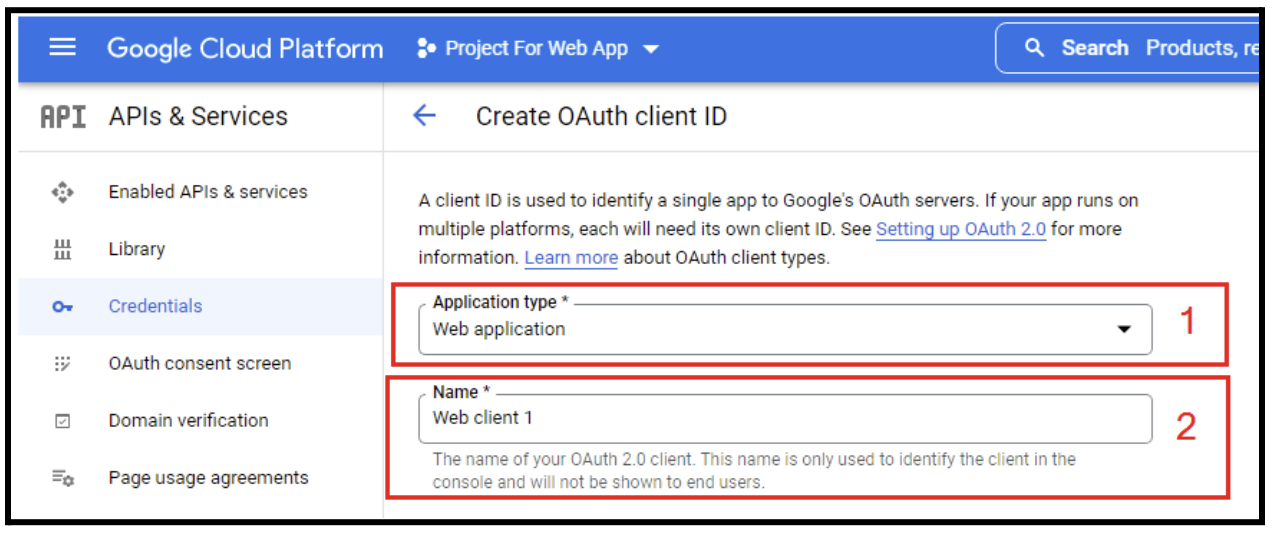
1.4.h. On OAuth client id creation screen:
- Select the “Web Application” from “Application Type” dropdown.
- Enter your OAuth 2.0 client name in the “Name” field.
- Enter Authorized JavaScript origins & Authorized redirect URIs if you have any.
- Click on “Create” Button.
1.4.i. It will display the popup with client id and client secret.
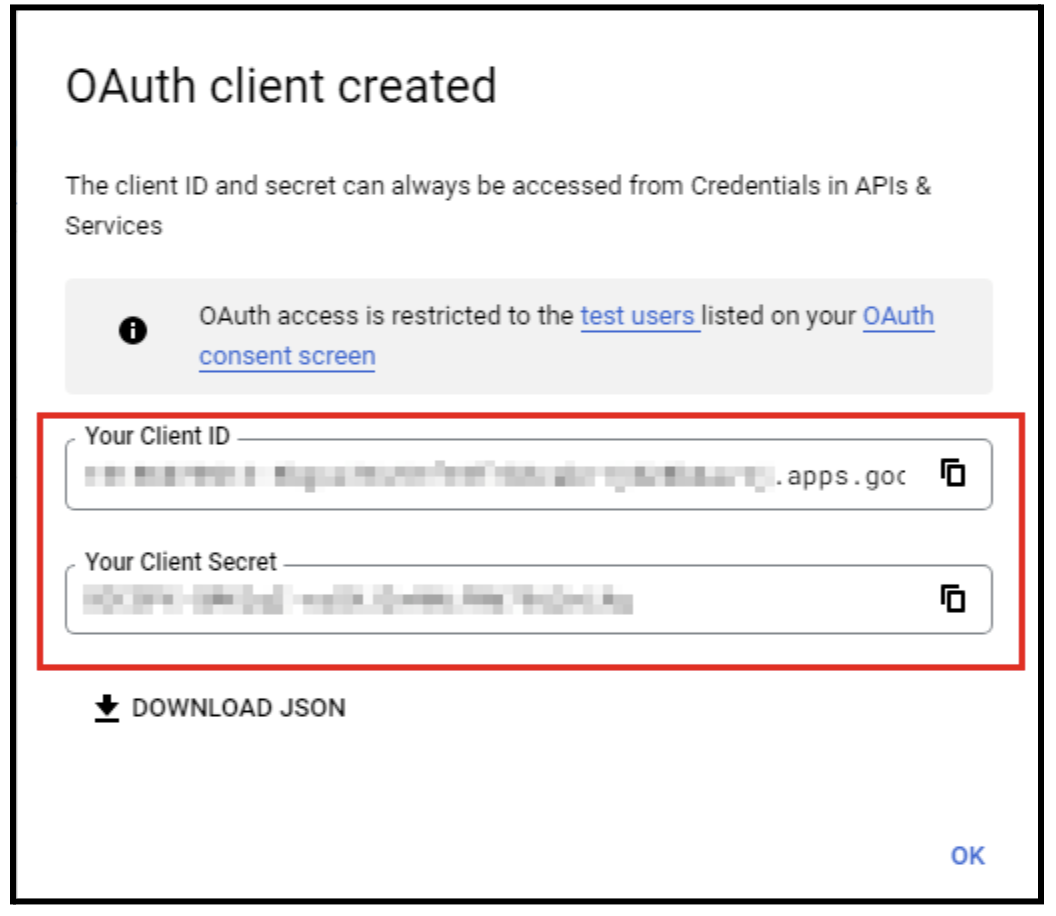
Also you can view your your Google OAuth Client ID & Google OAuth Client Secret on the top right side if you navigate to APIs & Services from drop-down main menu and click on Credentials.

Once the above steps are done for free credits, please go here to fill up a form to request Gen3 Workspace.
GCP Free credits FAQs
How do I track how much credits are spent?
- Log into GCP console at https://console.cloud.google.com/
- Go to Billing in the dropdown menu of the main menu navigation (three horizontal bars at the top left)
- You should see a summary of funds and time remaining on your free credits in the right column.

How long will my $300 credits be available?
Your credits will be available once you accept them in the GCP console. Credits will be available for three months, or until you have used up all $300, whichever comes first. You will get a notice from GCP before your credits run out.
What happens once the credits expire?
Once your credits run out or expire, you will be notified by GCP that you have no available credits. You can Upgrade to a paid account, and any additional costs will be charged to the credit card or bank account you gave when signing up.
Your credit card or bank account will not be changed unless you expressly give permission.
What happens when you upgrade to a paid Cloud Billing account?
You can upgrade your Cloud Billing account at any time after starting the Free Trial, to ensure that your resources keep running uninterrupted after the trial ends. You might also want to upgrade your account if you want to use features that are not included in the Free Trial, such as GPUs and Windows servers.
When you upgrade, the following conditions apply:
- If you upgrade before the trial is over: Any remaining, unexpired Free Trial credits remain in your Cloud Billing account. You can continue to use the resources you created during the Free Trial without interruption.For resources you use in excess of what’s covered by any remaining credit, your form of payment on file is charged (credit card or bank account).
- If you upgrade within 30 days of the end of the trial: Your resources are marked for deletion, but you might be able to recover them. Learn more about data deletion on Google Cloud.
- If you upgrade more than 30 days after the end of the trial, your Free Trial resources are lost.